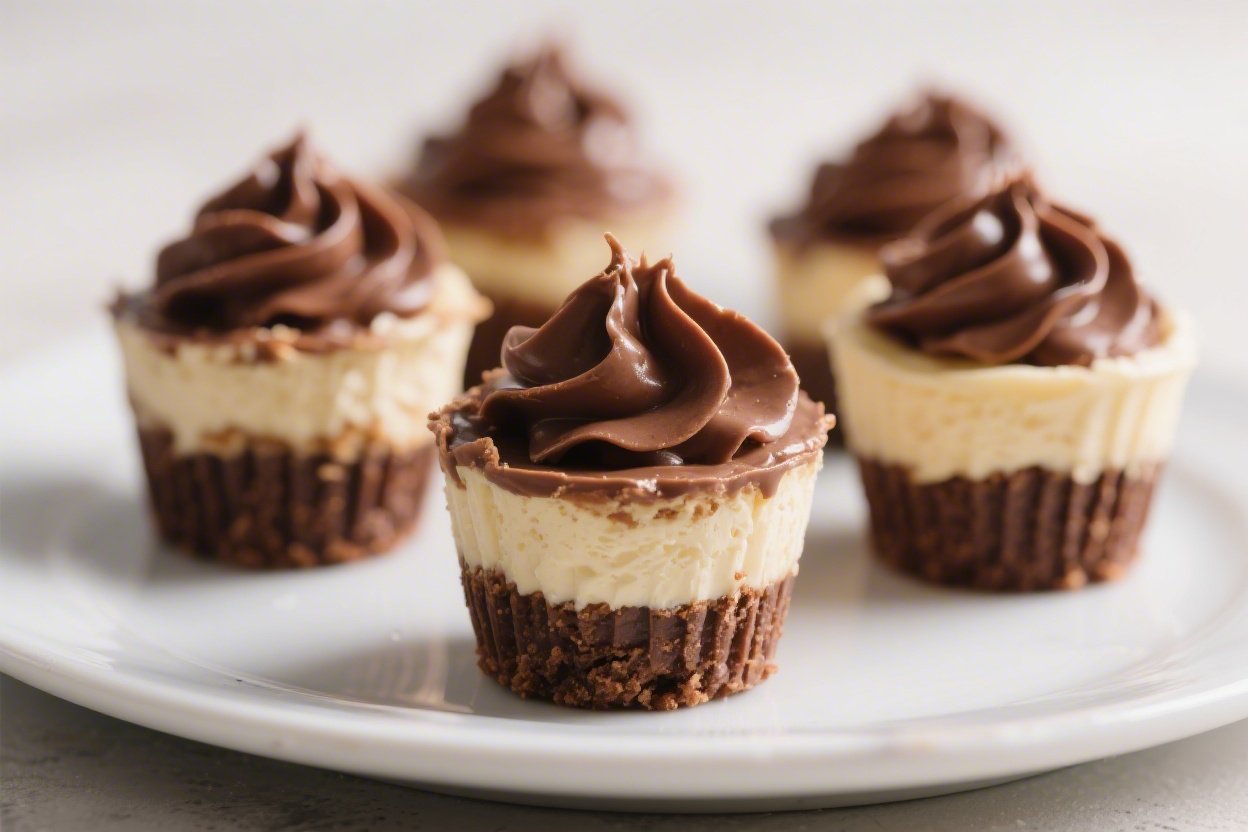
No-Bake Nutella Cheesecake Cups – Creamy, Simple, and Crowd-Pleasing
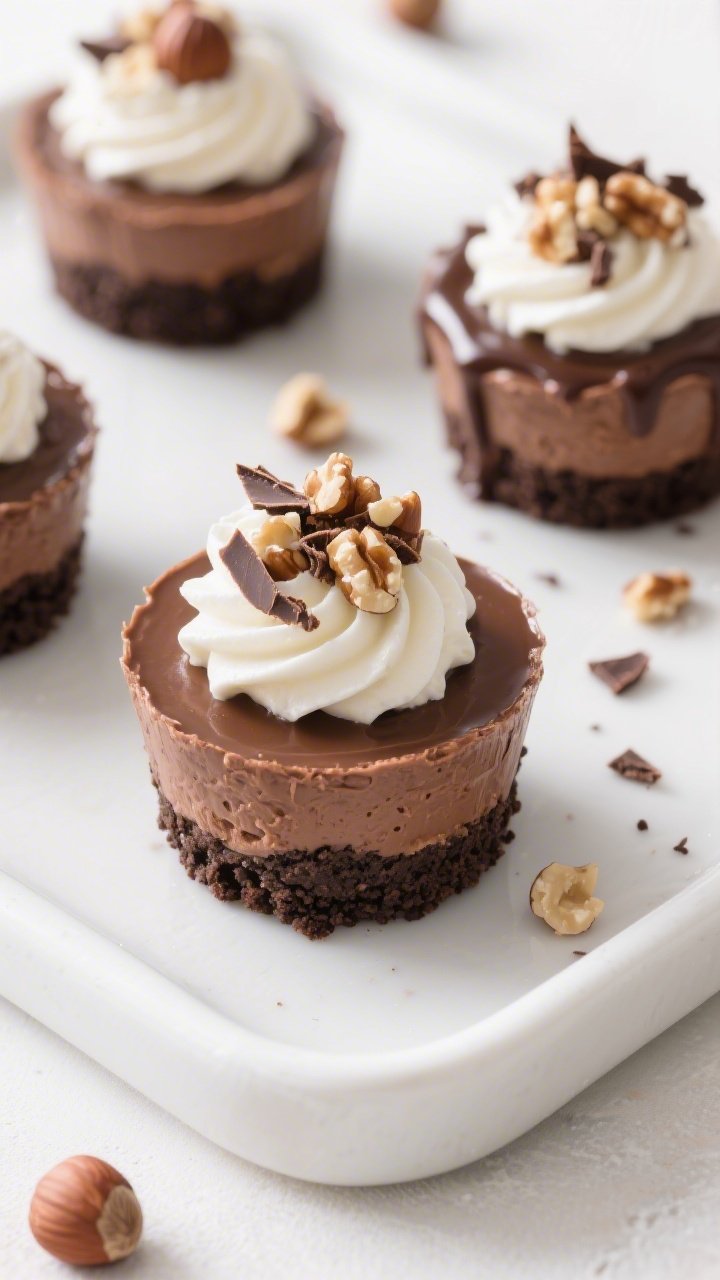
No oven, no stress, just pure creamy goodness in a cup. These No-Bake Nutella Cheesecake Cups are the kind of dessert that feels fancy but takes almost no effort. They’re rich, silky, and perfectly balanced with a buttery cookie base.
Whether you’re hosting friends or just want a sweet treat after dinner, this recipe delivers. Best of all, it sets in the fridge, so you can make it ahead and keep life easy.
What Makes This Recipe So Good
- Zero baking required: Everything sets in the fridge, which means no ovens, no fuss, and no risk of overbaking.
- Ultra creamy texture: The Nutella and cream cheese blend into a smooth, mousse-like filling that tastes like a chocolate-hazelnut dream.
- Perfectly portioned: Made in cups, jars, or ramekins, these are ideal for parties, meal prep, or late-night cravings.
- Flexible and forgiving: Swap cookies, change toppings, and adjust sweetness easily without messing up the base recipe.
- Make-ahead friendly: Prepares in minutes and chills while you get on with your day.
What You’ll Need
- For the crust:
- 1 1/2 cups (150 g) chocolate cookie crumbs (like Oreos without filling or chocolate graham crackers)
- 5 tablespoons (70 g) unsalted butter, melted
- 1 tablespoon granulated sugar (optional, skip if using sweet cookies)
- Pinch of fine sea salt
- For the filling:
- 12 ounces (340 g) full-fat cream cheese, softened to room temperature
- 1 cup (300 g) Nutella or chocolate-hazelnut spread
- 1/2 cup (60 g) powdered sugar, sifted
- 1 teaspoon pure vanilla extract
- 1 cup (240 ml) cold heavy whipping cream
- Pinch of fine sea salt
- For topping (optional but recommended):
- Whipped cream or extra whipped topping
- Chopped toasted hazelnuts
- Chocolate shavings or mini chocolate chips
- Fresh berries or a drizzle of warm Nutella
- Equipment: Mixing bowls, hand mixer or stand mixer, spatula, measuring cups/spoons, 6–8 small cups or jars (6–8 ounces each)
Instructions
- Make the crust. In a bowl, stir together chocolate cookie crumbs, melted butter, sugar (if using), and a pinch of salt until the mixture looks like wet sand.
- Portion the base. Spoon the crumb mixture evenly into your cups or jars. Press down firmly with the back of a spoon or the bottom of a small glass to form a compact layer.
Place in the fridge while you make the filling.
- Whip the cream. In a clean, cold bowl, beat the heavy cream to medium-stiff peaks. Do not overbeat. Set aside.
- Beat the cream cheese. In a separate bowl, beat the softened cream cheese until completely smooth and fluffy, about 2 minutes.
Scrape the bowl.
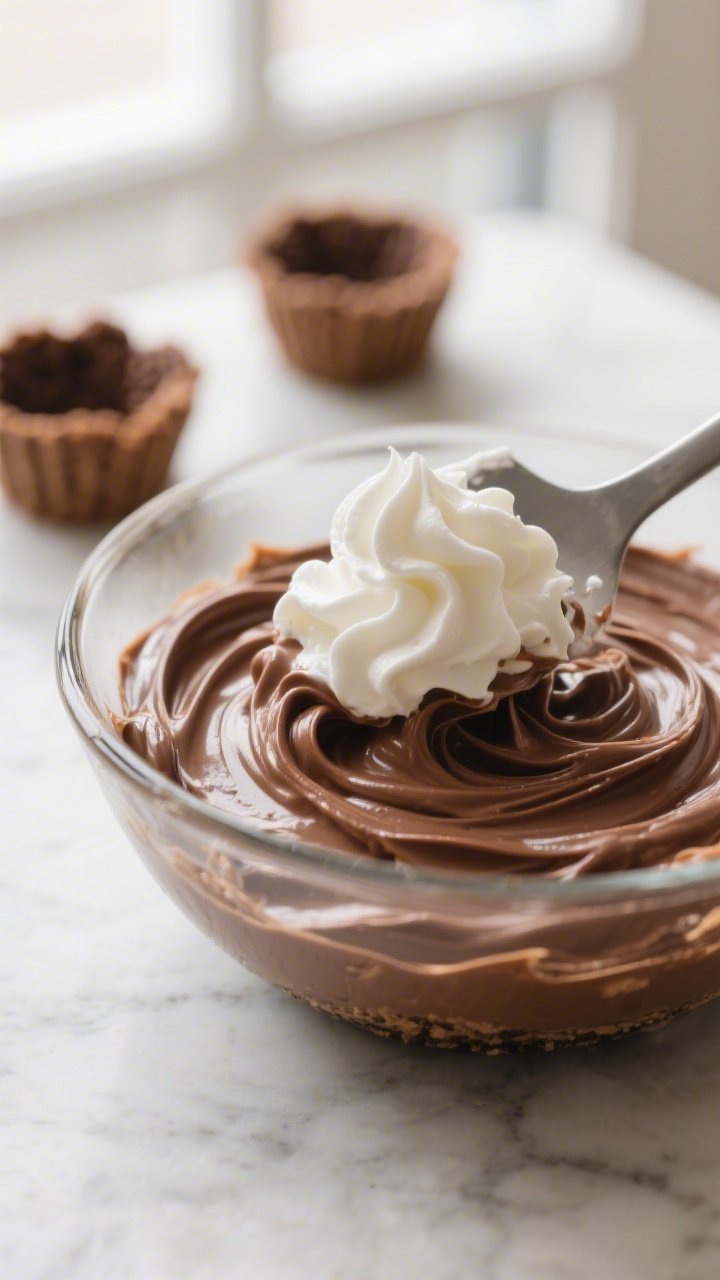
- Add Nutella and flavorings. Beat in the Nutella, powdered sugar, vanilla, and a pinch of salt until silky and well combined. Scrape the bowl again to make sure everything is mixed.
- Fold in whipped cream. Gently fold the whipped cream into the Nutella mixture in two additions. Use a spatula and light motions to keep the mixture airy.
- Fill the cups. Spoon or pipe the filling over the chilled crusts, smoothing the tops.
Tap the cups gently to level the surface.
- Chill. Cover and refrigerate for at least 3 hours, or until set. For the best texture and flavor, chill 4–6 hours.
- Add toppings and serve. Just before serving, top with whipped cream, toasted hazelnuts, and chocolate shavings. Add a drizzle of warm Nutella if you like.
Keeping It Fresh
- Refrigeration: Keep cups covered and chilled for up to 4 days.
The crust stays crispest in the first 48 hours.
- Freezing: You can freeze the filled, untopped cups for up to 1 month. Thaw overnight in the fridge, then add fresh toppings.
- Make-ahead tips: Assemble the crust and filling up to 24 hours ahead. Add whipped cream and crunchy toppings right before serving so they stay fresh.

Benefits of This Recipe
- Minimal effort, big payoff: Quick to assemble and looks polished enough for guests.
- No special skills required: Simple mixing and folding—no baking techniques to master.
- Kid-friendly and party-ready: Individual servings make it easy to portion and transport.
- Customizable sweetness: Adjust powdered sugar to taste, or use a less sweet cookie base for balance.
- Great texture contrast: Buttery crumb plus creamy filling equals pure dessert satisfaction.
What Not to Do
- Don’t skip softening the cream cheese. Cold cream cheese leads to lumps and a grainy texture.
- Don’t overbeat the whipped cream. Overwhipped cream turns clumpy and won’t fold in smoothly.
- Don’t use low-fat cream cheese. It can be watery and won’t set as nicely.
Full-fat gives the best body and flavor.
- Don’t overload with toppings early. Add toppings just before serving to avoid soggy nuts and weepy whipped cream.
- Don’t skip the chill time. The filling needs time to firm up for clean, neat scoops.
Recipe Variations
- Salted pretzel crust: Swap cookie crumbs for finely crushed pretzels. Reduce added salt and skip extra sugar for a sweet-salty twist.
- Hazelnut crunch: Stir 1/2 cup of finely chopped toasted hazelnuts into the filling for a bit of crunch.
- Mocha swirl: Dissolve 1–2 teaspoons instant espresso powder in 1 tablespoon warm water and beat into the filling for a subtle coffee note.
- Berry layer: Add a thin layer of raspberry or strawberry preserves over the crust before the filling. The tartness balances the richness.
- Gluten-free: Use gluten-free chocolate cookies or a blend of gluten-free graham-style crumbs.
- Lightly sweet version: Reduce powdered sugar to 1/4 cup and use a plainer biscuit crust (like digestive biscuits) to let the Nutella shine.
- Mini bites: Assemble in mini dessert cups or shot glasses for bite-size party treats.
FAQ
Can I use a store-bought crust instead?
Yes, but since these are individual cups, it’s easier to make a quick crumb base in each container.
If you prefer one large dessert, you can press the crust into an 8-inch pie dish and add the filling on top.
What if I don’t have a mixer?
A whisk will work for the filling if the cream cheese is very soft, but whipping cream by hand takes effort. Chill your bowl and whisk, and whisk the cream until thick before folding it in.
How sweet is this dessert?
It’s moderately sweet thanks to the Nutella. If you prefer less sweetness, reduce or skip the powdered sugar and use a less sugary cookie base.
Can I make this dairy-free?
You can try dairy-free cream cheese and a coconut-based whipped topping.
Texture and flavor will change slightly, but it still sets well. Be sure your chocolate-hazelnut spread is dairy-free.
Why is my filling runny?
Most likely the cream wasn’t whipped enough, or the cream cheese was too warm and loose. Chill the mixture 20–30 minutes, then portion into cups and chill fully.
Next time, whip to medium-stiff peaks.
Do I need gelatin to help it set?
No. The whipped cream and cream cheese create a stable, mousse-like texture without gelatin. Just give it enough time in the fridge.
Can I make it in advance for a party?
Absolutely.
Assemble up to 24 hours ahead, cover, and chill. Add whipped cream and crunchy toppings right before serving for the best look and texture.
What size cups should I use?
Cups or jars that hold 6–8 ounces work well. This recipe typically makes 6–8 servings depending on how generously you portion.
Do these travel well?
Yes.
Use jars with lids or cover cups tightly and keep chilled in a cooler. Add toppings after you arrive.
Can I reduce the Nutella?
You can. Using 2/3 cup Nutella gives a milder chocolate-hazelnut flavor and a slightly lighter texture.
Taste and adjust sweetness if needed.
In Conclusion
These No-Bake Nutella Cheesecake Cups are creamy, quick, and endlessly flexible. With a simple crumb base and a silky, Nutella-forward filling, they’re the kind of dessert you can rely on anytime. Make them ahead, dress them up with toppings, and serve in cute cups for instant charm.
When you want something rich without turning on the oven, this recipe is a clear win. Enjoy every spoonful.