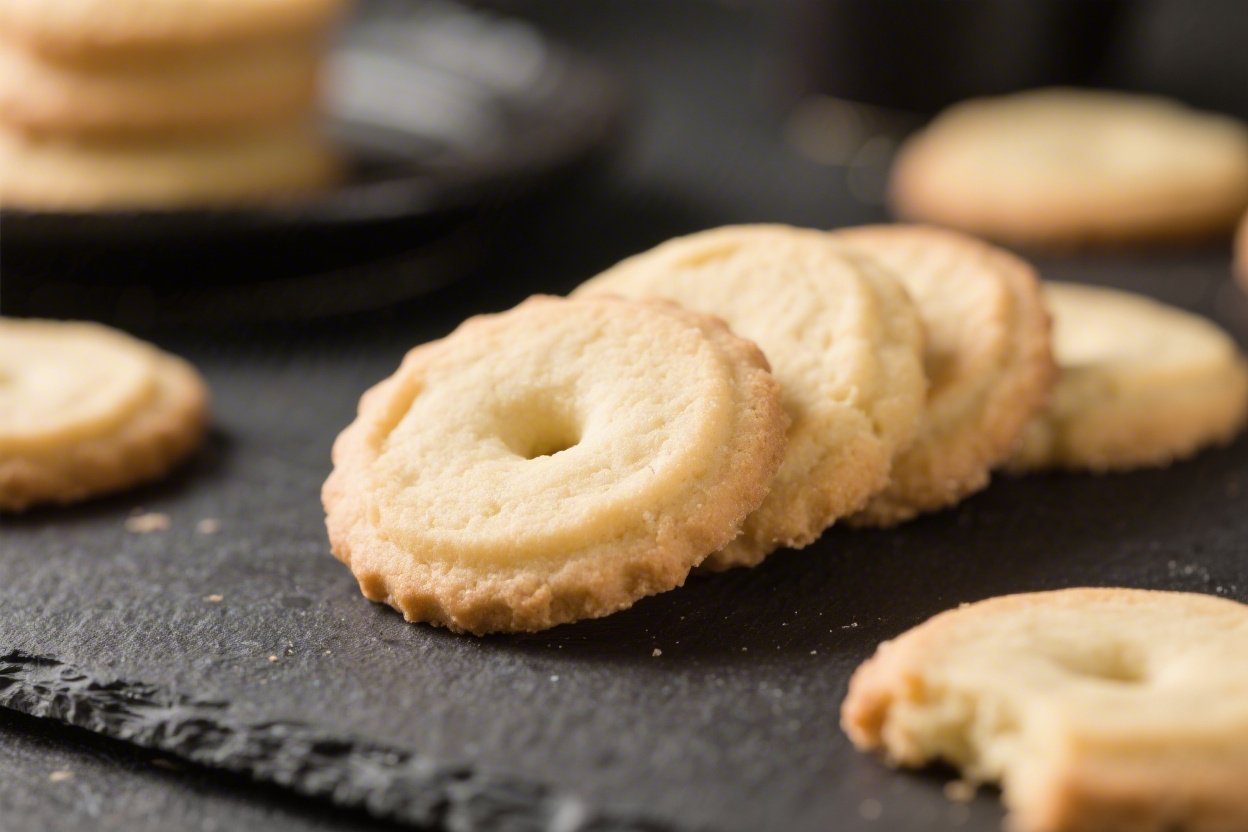
3-Ingredient Butter Cookies – Simple, Classic, and Melt-in-Your-Mouth
These cookies are the kind of recipe you keep on a sticky note inside a cabinet door. They’re buttery, crisp at the edges, and tender in the center—exactly what a classic butter cookie should be. No mixers required, no complicated steps, and nothing you can’t pronounce.
Just three ingredients and a few minutes of hands-on time. If you need a quick treat for guests, a bake sale, or a cozy afternoon, this is a no-fuss win.
Why This Recipe Works
Three ingredients, zero fuss. The magic here is in the ratio: butter for richness, sugar for sweetness and structure, and flour to bring it all together. There’s no leavening, so the texture stays short and delicate.
A quick chill helps the dough keep its shape and bake up evenly.
Room-temperature butter blends smoothly with sugar to create a soft, creamy base. That means fewer lumps and a consistent crumb. Using a little salt (if your butter is unsalted) keeps the flavor from falling flat and makes the butter flavor pop.
No special gear is needed. You can mix by hand with a spatula, shape with a spoon, and bake on any sturdy sheet pan.
The dough is forgiving, so it’s perfect for beginners and a breeze for seasoned bakers.
Ingredients
- 1 cup (2 sticks/226 g) unsalted butter, softened to room temperature
- 1/2 cup (100 g) granulated sugar (or superfine sugar for a smoother dough)
- 2 cups (240 g) all-purpose flour
- Optional but recommended: 1/4 teaspoon fine salt if using unsalted butter
- Optional finish: coarse sugar for rolling, or a light dusting of powdered sugar after baking
Instructions
- Prep your pan and oven: Heat oven to 350°F (175°C). Line 2 baking sheets with parchment paper or a silicone mat.
- Cream the butter and sugar: In a medium bowl, stir the softened butter and sugar together until smooth, light, and creamy. This takes 1–2 minutes by hand or 30–60 seconds with a handheld mixer on low.
If using, mix in the salt.
- Add the flour: Sprinkle in the flour in two additions. Stir just until the dough comes together and no dry patches remain. It should be soft but not sticky.
If it looks crumbly, keep folding; it will come together.
- Chill briefly: For neater edges, cover the bowl and chill the dough for 15–20 minutes. This firms up the butter and helps the cookies hold their shape.
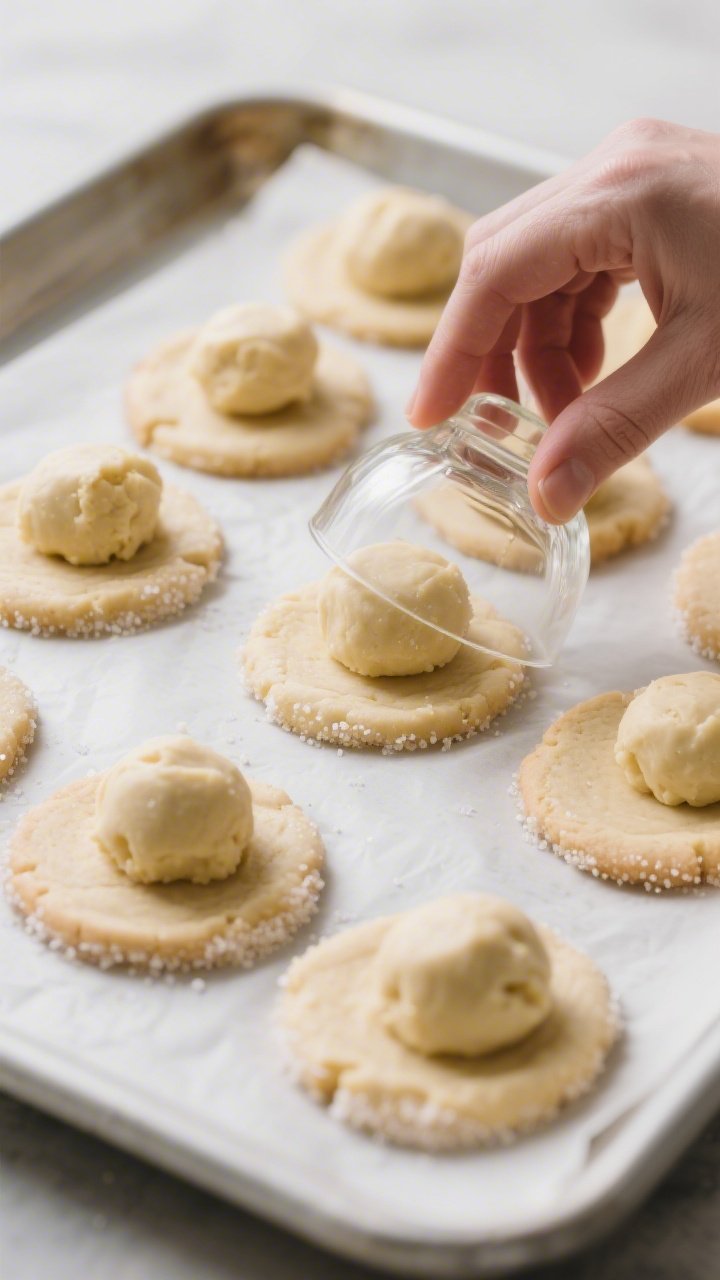
- Shape the cookies: Scoop 1 tablespoon portions and roll into balls. Place 2 inches apart on the prepared sheets.
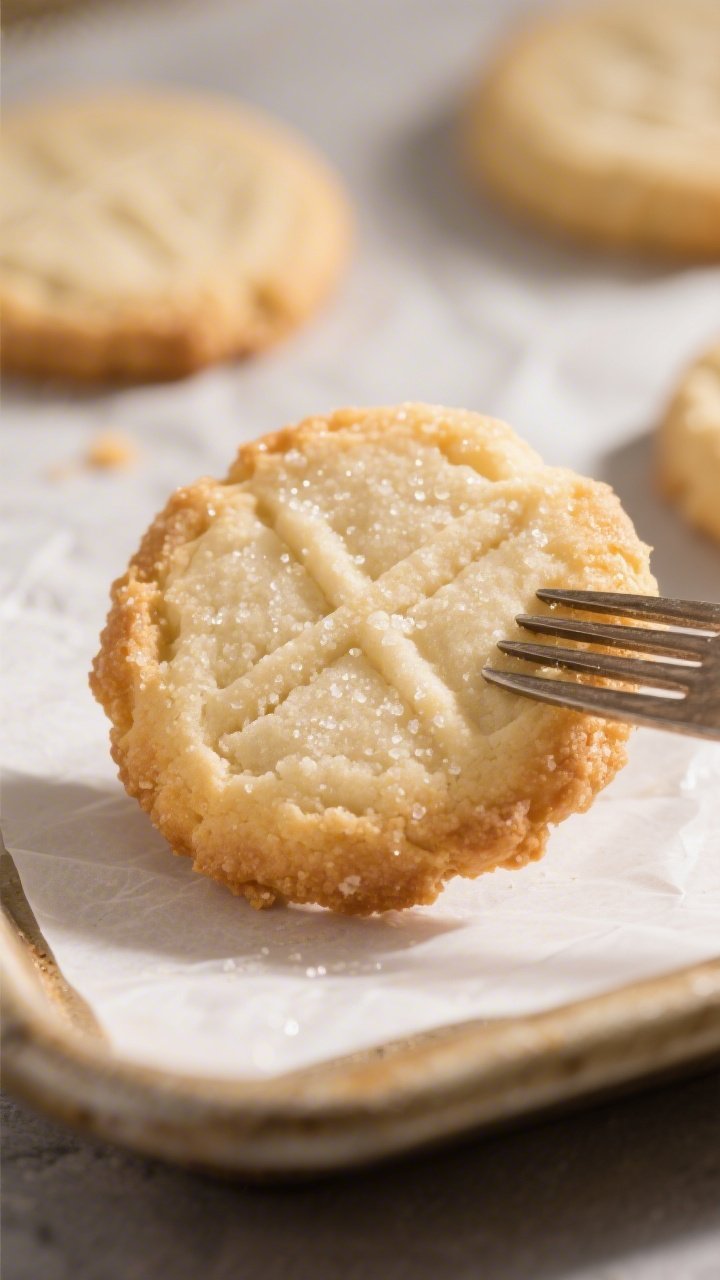
For the classic look, press each ball gently with the back of a fork or the bottom of a glass to flatten to about 1/3 inch thick. If you like, roll the edges in coarse sugar first.
- Bake: Bake 10–13 minutes, until the edges are just turning golden and the centers look set. Rotate the pans halfway for even browning.
- Cool: Let cookies rest on the sheet for 5 minutes, then move to a wire rack to cool completely.
They’ll crisp up as they cool.
- Finish (optional): Dust with powdered sugar once fully cool, or dip one edge in melted chocolate and let set.
How to Store
- Room temperature: Keep in an airtight container for 5–7 days. Add a small piece of bread to the container to maintain softness if your kitchen is dry.
- Freezing baked cookies: Layer between sheets of parchment and freeze for up to 2 months. Thaw uncovered at room temperature to keep the edges crisp.
- Freezing dough: Roll into a log, wrap tightly, and freeze for up to 2 months.
Slice and bake straight from frozen, adding 1–2 minutes to the bake time.

Health Benefits
This is a treat, and that’s okay. These cookies are made with simple, recognizable ingredients and contain no artificial flavors or preservatives. A small portion can fit into a balanced diet.
Butter offers fat-soluble vitamins like A and E in modest amounts, and fat helps with satiety, which can prevent overeating.
If you’re mindful of sugar, the total sugar here is relatively moderate compared to many desserts. You can also make smaller cookies to manage portion size. For those with dietary needs, you can explore the variations below for gluten-free tweaks or reduced sugar swaps.
Common Mistakes to Avoid
- Using cold butter: Cold butter won’t cream smoothly, and your cookies may bake up dense and uneven.
Aim for soft but not greasy.
- Overmixing the dough: Once the flour goes in, stir just until combined. Overworking develops gluten, which can make cookies tough.
- Skipping the chill: A short chill keeps the cookies from spreading too much and helps define the edges.
- Overbaking: Pull them when the edges are lightly golden. They’ll firm up as they cool.
Too long in the oven equals dry, crumbly cookies.
- Measuring flour incorrectly: Scooping packed flour leads to dry dough. Fluff the flour, spoon into the cup, and level off—or use a scale for accuracy.
Recipe Variations
- Vanilla or citrus: Add 1 teaspoon vanilla extract or 1 teaspoon finely grated lemon or orange zest to the butter-sugar mixture.
- Almond twist: Mix in 1/2 teaspoon almond extract and press a whole almond on top before baking.
- Shortbread-style bars: Press the dough into an 8-inch square pan lined with parchment. Dock with a fork.
Bake 18–22 minutes, cool, then slice into fingers.
- Chocolate-dipped: After cooling, dip half of each cookie in melted dark or milk chocolate. Sprinkle with chopped nuts or coconut.
- Jam thumbprints: Roll into balls, press a well with your thumb, and fill with 1/2 teaspoon jam. Bake as directed.
- Gluten-free option: Use a 1:1 gluten-free all-purpose blend that includes xanthan gum.
The texture will be slightly more delicate, but still buttery and crisp.
- Less sweet: Reduce sugar to 1/3 cup for a more biscuit-like cookie. Expect a slightly crumblier texture.
- Spiced: Add 1/2 teaspoon ground cinnamon or cardamom for warm flavor without extra ingredients.
FAQ
Can I use salted butter?
Yes. If you use salted butter, skip the added salt.
Different brands vary in saltiness, so your cookies may taste slightly saltier, but still delicious.
Why did my cookies spread too much?
The dough was likely too warm, or the butter was overly soft. Chill the dough 15–30 minutes before baking, and make sure your oven is fully preheated.
Can I make the dough ahead?
Absolutely. Keep it in the fridge for up to 2 days or freeze for up to 2 months.
If chilled, let it sit at room temp for 10–15 minutes before shaping.
Is powdered sugar better than granulated sugar?
Powdered sugar creates a more tender, meltaway texture. Granulated sugar gives a slightly crisper bite. Both work; it’s a matter of preference.
How do I get neat, uniform cookies?
Use a tablespoon scoop for consistent size, roll evenly, and press to the same thickness.
Chilling helps edges stay sharp. A cookie stamp also works well.
Can I double the recipe?
Yes. Double all ingredients, but bake in batches so the cookies have space to spread.
Rotating pans halfway through still helps with even browning.
What if my dough is too crumbly?
Keep gently folding; crumbs usually come together with a bit more mixing. If still dry, add 1–2 teaspoons of milk or water to bind.
How do I know they’re done?
Look for pale centers with lightly golden edges. If the whole cookie is golden brown, they’re likely overbaked and will be drier.
Wrapping Up
These 3-Ingredient Butter Cookies are proof that simple can be spectacular.
With one bowl, a few pantry staples, and less than 30 minutes of effort, you’ll have a batch of classic, buttery cookies ready to share—or keep. Tweak them with a splash of vanilla or a dip in chocolate, and they’ll still hold their charm. Keep this recipe close; it’s the reliable, easy bake you’ll turn to again and again.
Printable Recipe Card
Want just the essential recipe details without scrolling through the article? Get our printable recipe card with just the ingredients and instructions.