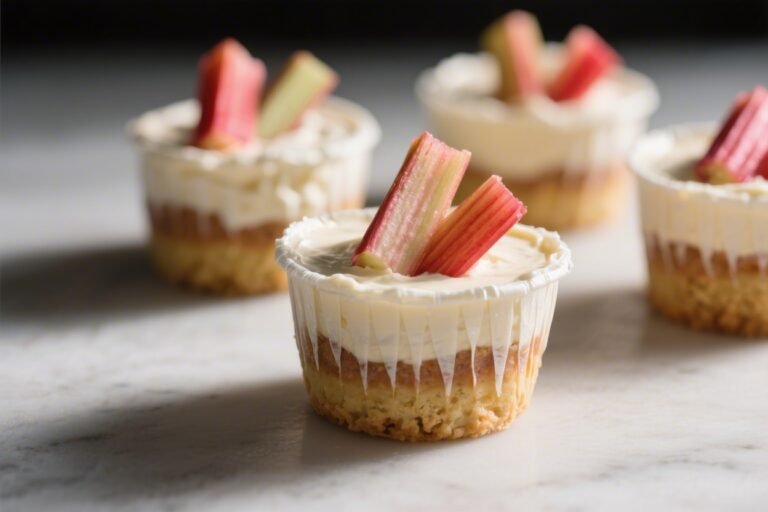
Cheesecake Bites That Are Easy to Make Ahead – Bite-Sized, Crowd-Pleasing Treats
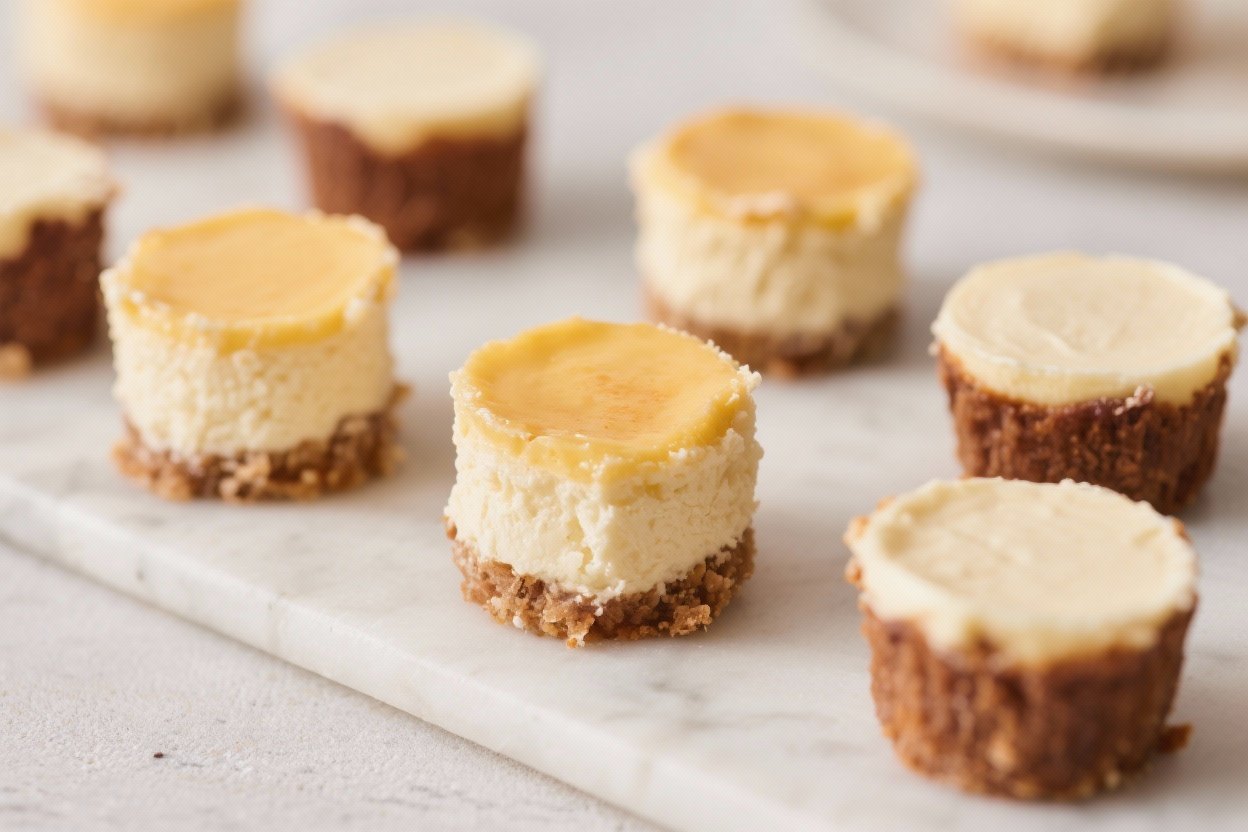
These cheesecake bites are the kind of dessert you can make days before a party and still serve like they were made fresh. They’re creamy, rich, and just the right size for a quick, sweet bite. No fancy tools or skills needed—just a muffin tin and a few basic ingredients.
You can top them a dozen different ways, and they freeze like a dream. If you love cheesecake but don’t want to deal with a full cake, these are your new favorite shortcut.
What Makes This Special
- Make-ahead friendly: Bake, chill, and freeze. They hold up beautifully and thaw quickly.
- Perfect portions: One or two bites per cup means easy serving and less mess.
- Customizable: Choose your crust, flavors, and toppings to fit any occasion.
- Reliable texture: Creamy center with a tender crust—no water bath required.
- Works for parties or snacks: Great for potlucks, birthdays, or a weeknight treat.
Ingredients
For the Crust
- 1 1/2 cups (about 150 g) graham cracker crumbs
- 3 tablespoons granulated sugar
- 6 tablespoons unsalted butter, melted
- Pinch of fine salt
For the Cheesecake Filling
- 16 ounces (450 g) cream cheese, softened
- 2/3 cup granulated sugar
- 2 large eggs, room temperature
- 1/3 cup sour cream
- 2 teaspoons vanilla extract
- 1 tablespoon lemon juice (optional, for brightness)
- Pinch of fine salt
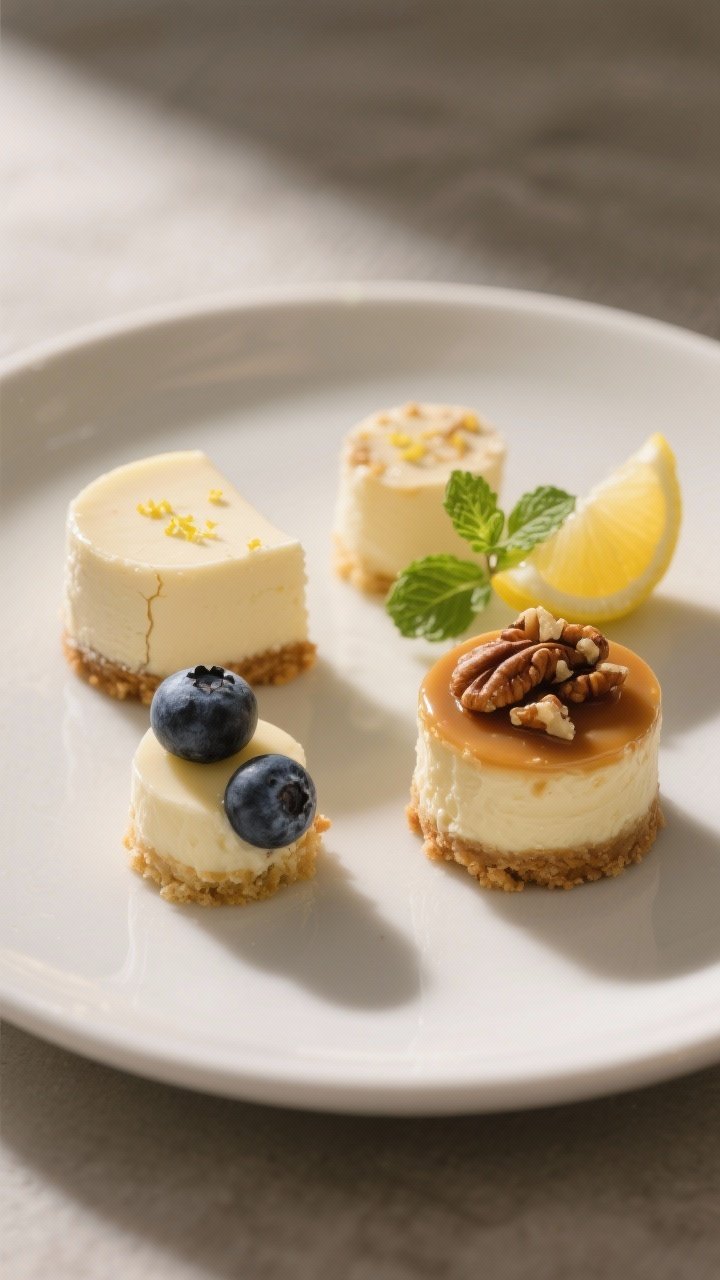
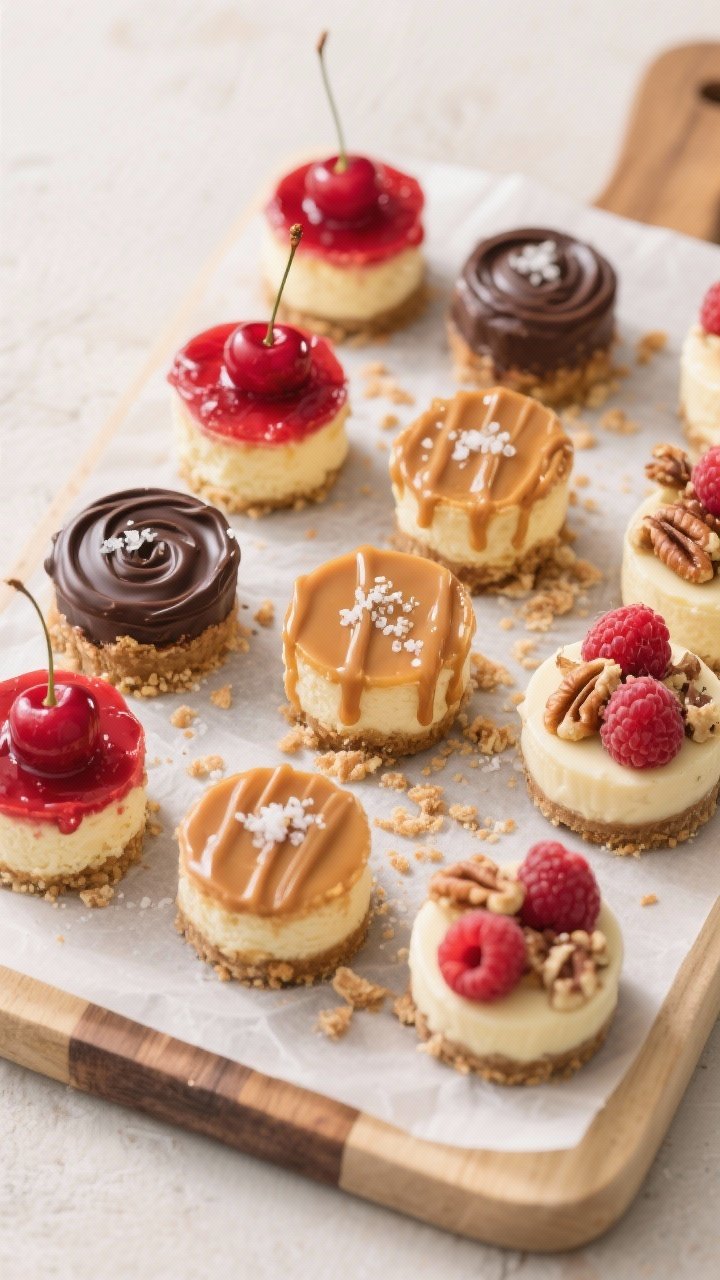
Optional Toppings
- Cherry, raspberry, or strawberry preserves
- Chocolate ganache or melted chocolate
- Caramel sauce and a pinch of flaky sea salt
- Fresh berries
- Crushed cookies or nuts
How to Make It
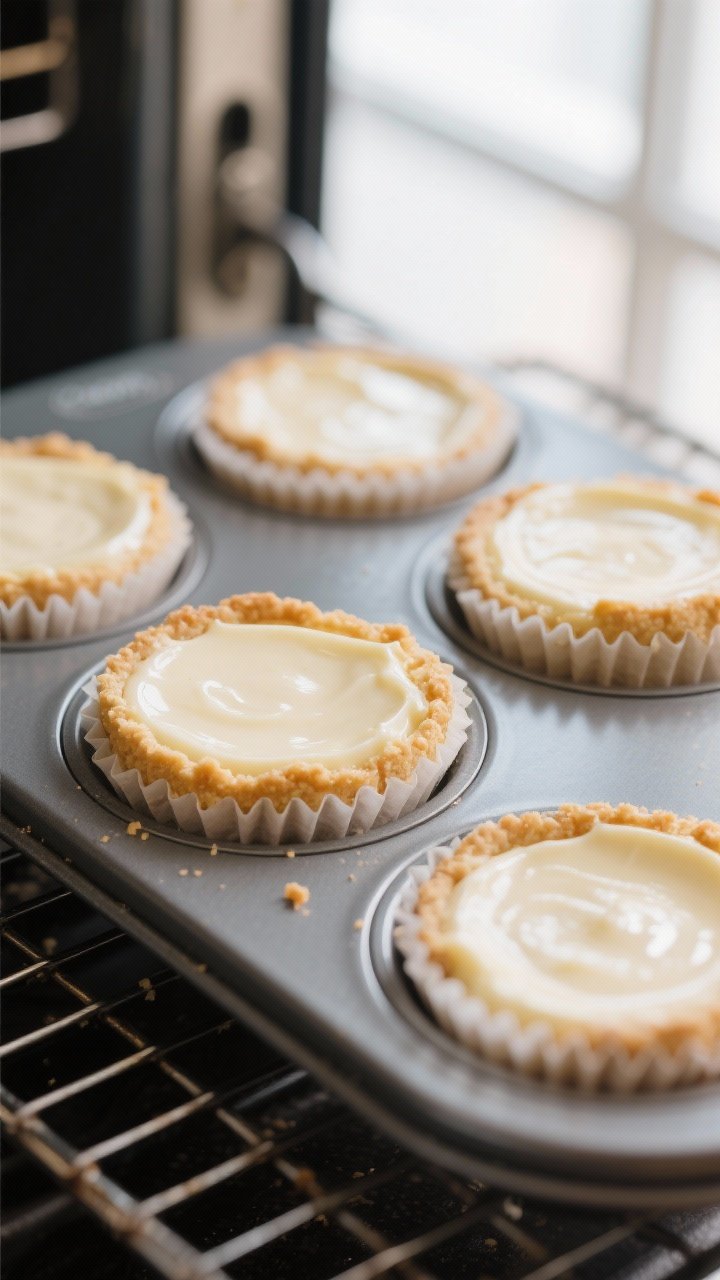
- Prep the pan: Line a 12-cup muffin tin with paper liners.
For mini bites, use a mini muffin tin and liners. Preheat your oven to 325°F (165°C).
- Mix the crust: Stir graham crumbs, sugar, salt, and melted butter until the mixture looks like damp sand.
- Press the crust: Spoon about 1 tablespoon of crust mixture into each liner (use 2 teaspoons for mini tins). Press firmly with the back of a spoon or a small flat-bottomed cup.
- Pre-bake: Bake the crusts for 5–7 minutes (3–4 minutes for mini) until lightly set.
Let cool while you make the filling.
- Beat the cream cheese: In a large bowl, beat softened cream cheese on medium speed until smooth and fluffy, about 1–2 minutes. Scrape down the bowl.
- Add sugar and salt: Beat in the sugar and a pinch of salt until creamy and no graininess remains.
- Add eggs: Beat in the eggs one at a time on low speed just until combined. Avoid overmixing to prevent cracks.
- Finish the batter: Mix in sour cream, vanilla, and lemon juice (if using) until smooth.
The batter should be silky and pourable.
- Fill the cups: Divide the batter evenly among the liners, filling about 3/4 full. Tap the pan gently to release air bubbles.
- Bake: Bake at 325°F (165°C) for 16–18 minutes (10–12 for mini). The centers should jiggle slightly, and the edges should look set but not browned.
- Cool gradually: Turn off the oven, crack the door, and leave the pan inside for 10 minutes.
Then cool at room temperature for 30–45 minutes.
- Chill: Refrigerate for at least 2 hours, or until fully set. Add toppings just before serving or after chilling.
Storage Instructions
- Refrigerator: Store in an airtight container for up to 5 days. Keep toppings separate for best texture.
- Freezer: Freeze on a baking sheet until firm, then transfer to a freezer-safe bag or container.
They keep well for 2 months.
- Thawing: Thaw in the fridge for a few hours or at room temperature for 30–45 minutes. Add fresh fruit or sauces after thawing.
- Travel tip: If transporting, keep them chilled with an ice pack to maintain structure.
Why This is Good for You
- Built-in portion control: Small servings make it easier to enjoy dessert without going overboard.
- Flexible ingredients: You can swap in Greek yogurt, reduced-fat cream cheese, or a nut-based crust.
- Make-ahead convenience: Planning dessert in advance cuts stress and helps you host more easily.
- Simple, real ingredients: No mixes or mystery items—just staples from your pantry and fridge.
Pitfalls to Watch Out For
- Overmixing the batter: This adds too much air, which can cause cracks. Mix on low and stop when combined.
- Overbaking: Dry, cracked cheesecake happens when you bake until firm.
Pull them when the centers still wobble a bit.
- Skipping the chill: They need time to set. Rushing leads to soft centers and messy edges.
- Warm ingredients: If cream cheese isn’t softened, you’ll get lumps. Room temperature is key.
- Wet toppings too early: Jam or fresh fruit can weep.
Add just before serving for the cleanest look.
Variations You Can Try
- Chocolate swirl: Warm 1/3 cup chocolate chips with 1 tablespoon cream. Spoon on top of batter and swirl with a toothpick before baking.
- Lemon blueberry: Add 1 tablespoon lemon zest to the batter and press a few fresh blueberries into each cup.
- Salted caramel pecan: Top cooled bites with caramel sauce and chopped toasted pecans, plus a pinch of flaky salt.
- Cookie crust swaps: Try crushed Oreos, Biscoff cookies, or gluten-free graham crackers for a twist.
- Mini pumpkin: Stir in 1/3 cup pumpkin puree and 1/2 teaspoon pumpkin pie spice to the batter. Reduce bake time slightly if using mini tins.
- Strawberry shortcake: Use vanilla wafer crust, then top with sliced strawberries and a dab of whipped cream.
FAQ
Can I make these without a mixer?
Yes.
Use a sturdy whisk and a spatula. Make sure the cream cheese is very soft so it blends smoothly without lumps.
How do I prevent cracks?
Don’t overmix, bake at a moderate temperature, and pull them while the centers still jiggle. Cooling in the turned-off oven with the door cracked also helps.
Can I use low-fat cream cheese?
You can, but the texture will be slightly less rich and may be a bit softer.
Full-fat gives the smoothest, creamiest result.
What’s the best way to add fruit?
Spoon a small dollop of preserves on top after chilling, or add fresh berries just before serving. For baking fruit in, choose firm berries and don’t overload.
How far in advance can I make them?
Up to 2 days ahead in the fridge or up to 2 months in the freezer. Add toppings after thawing for the best appearance.
Do I need a water bath?
No.
The small size bakes evenly without one, as long as you avoid overbaking and cool them gently.
How do I make them mini?
Use a mini muffin tin with liners, reduce crust and batter amounts per cup, and bake for about 10–12 minutes. Check early, as minis set fast.
Can I make these gluten-free?
Yes. Use gluten-free graham crackers or almond flour for the crust.
If using almond flour, add an extra tablespoon of butter to help it bind.
Final Thoughts
Cheesecake bites are the kind of dessert that make you feel prepared and a little bit fancy with almost no effort. They come together fast, hold up for days, and welcome any topping you like. Keep a batch in the freezer, and you’ll always be ten minutes away from a crowd-pleasing treat.
Once you try these, you might never bother with a full-sized cheesecake again.
Printable Recipe Card
Want just the essential recipe details without scrolling through the article? Get our printable recipe card with just the ingredients and instructions.