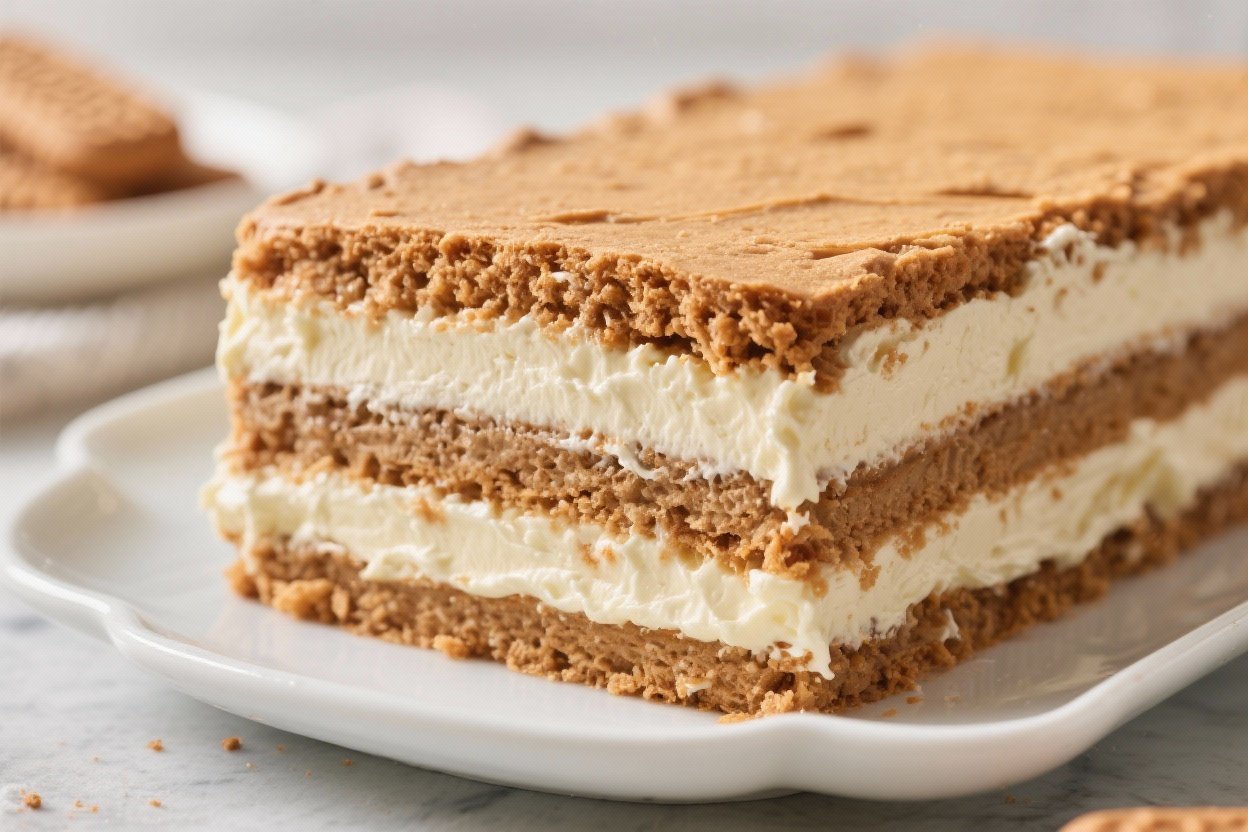
No-Bake Biscoff Icebox Cake With Cream Cheese Filling – Simple, Creamy, and Irresistible
If you’re craving a dessert that tastes bakery-level but takes almost no effort, this no-bake Biscoff icebox cake is it. Layers of spiced Speculoos cookies soften into a dreamy cake, held together by a silky cream cheese filling. It’s cool, creamy, and full of caramelized cookie flavor that feels cozy any time of year.
You don’t need an oven, fancy tools, or advanced skills—just a mixing bowl and a chill time. Make it ahead for holidays, birthdays, or whenever you want something sweet with minimal fuss.
What Makes This Special
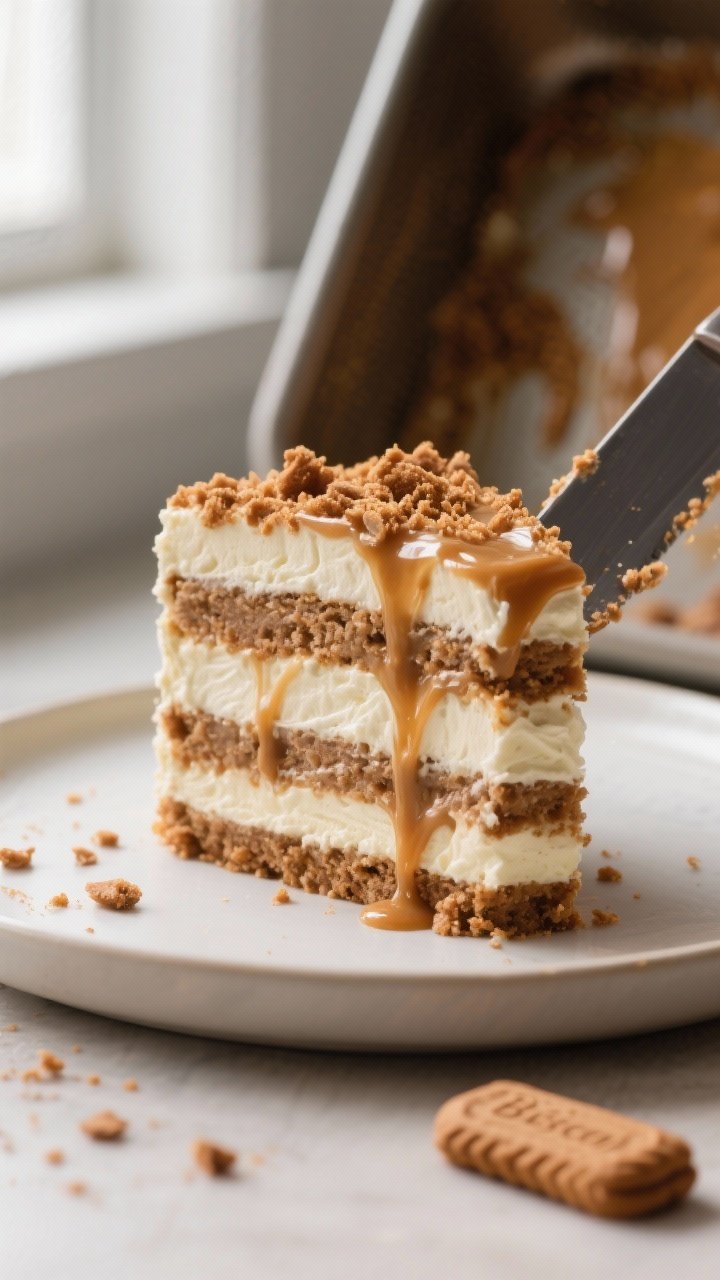
This dessert hits that perfect balance of sweet, spiced, and creamy. The Biscoff cookies become tender as they rest, turning into cake-like layers without any baking.
The cream cheese adds a gentle tang that keeps the dessert from feeling too sweet.
- No-bake convenience: Ideal for hot days or quick prep.
- Elegant flavor: Warm spice, caramel notes, and a cool cream filling.
- Make-ahead friendly: Tastes better after chilling overnight.
- Flexible: Easy to adjust sweetness, add toppings, or make gluten-free.
What You’ll Need
- Biscoff cookies (Lotus Speculoos): About 2 standard sleeves (roughly 40–48 cookies) for a 9×9-inch pan.
- Cream cheese: 16 oz (2 blocks), softened to room temperature.
- Heavy whipping cream: 2 cups, well chilled.
- Powdered sugar: 1/2 to 3/4 cup, to taste.
- Vanilla extract: 1–2 teaspoons.
- Biscoff spread (cookie butter): 1/2 cup, slightly warmed so it’s pourable.
- Pinch of salt: Optional, but it rounds out the sweetness.
- Optional add-ins/toppings:
- Crushed Biscoff for garnish
- Fresh berries or sliced bananas
- A drizzle of melted Biscoff or chocolate
- Cinnamon or cocoa powder for dusting
How to Make It
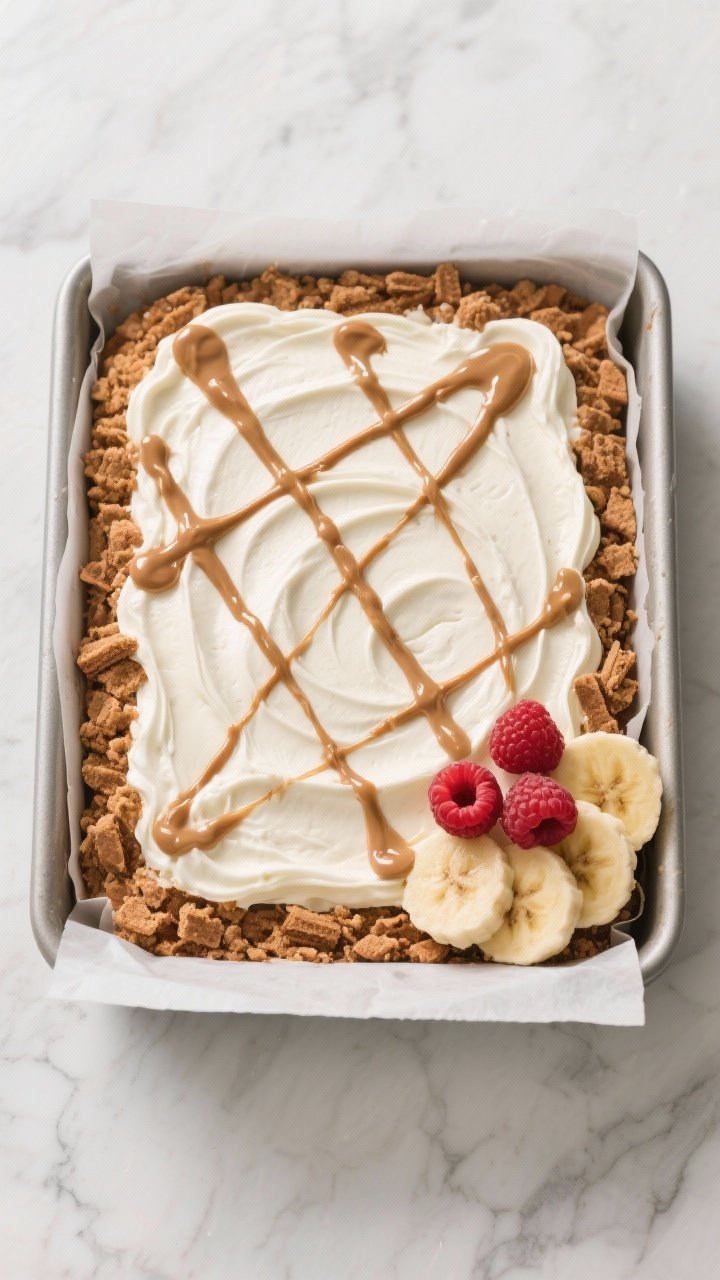
- Prep your pan. Line a 9×9-inch square dish or loaf pan with parchment, leaving overhang for easy lifting. This helps keep the edges neat.
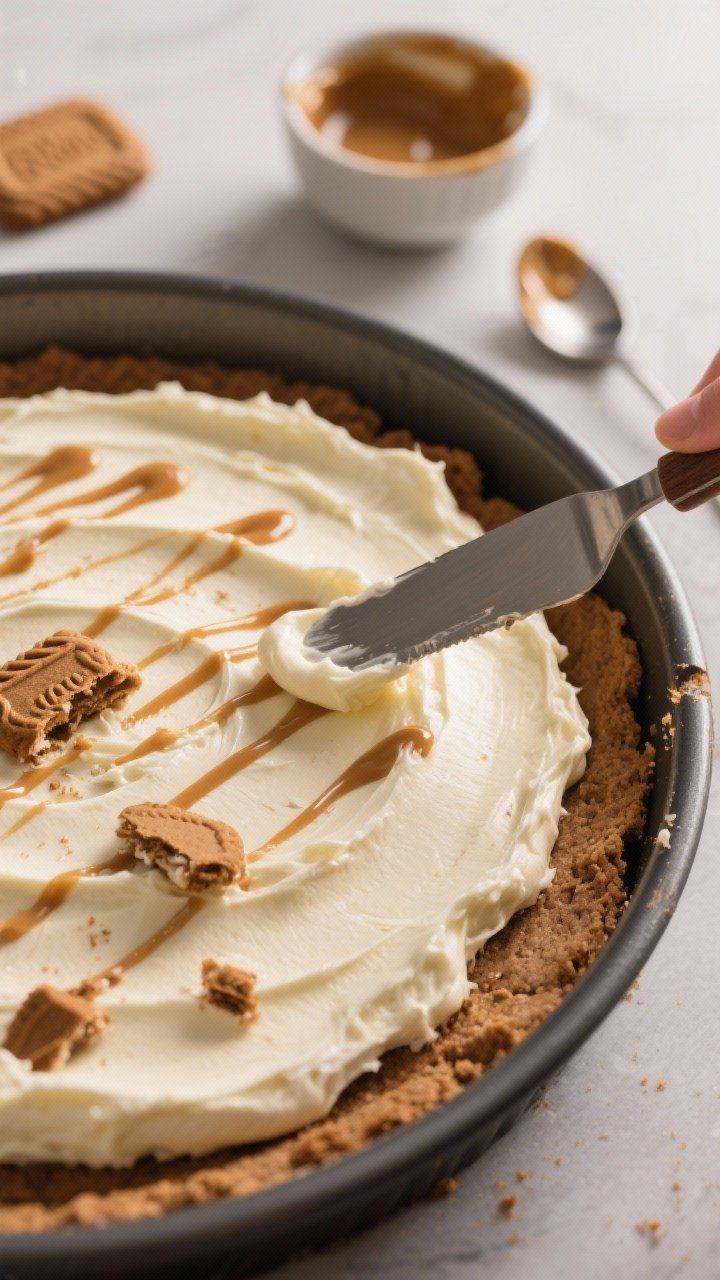
- Beat the cream cheese. In a large bowl, beat the softened cream cheese with an electric mixer until smooth and fluffy, about 2 minutes. Scrape down the sides so there are no lumps.
- Add sugar, vanilla, and salt. Mix in the powdered sugar, vanilla, and a pinch of salt.
Start with 1/2 cup sugar and adjust to taste. Beat until silky.
- Whip the cream. In a separate chilled bowl, whip the heavy cream to stiff peaks. You want it thick and pillowy, not grainy.
- Fold together. Gently fold the whipped cream into the cream cheese mixture in two additions.
Use a spatula and keep the mixture airy. This is your filling.
- Warm the Biscoff spread. Microwave the cookie butter for 10–15 seconds until pourable. Stir until smooth.
- Layer 1: Cookies. Add a single layer of Biscoff cookies to the bottom of the pan.
Break a few to fill any gaps—snug is good but not crammed.
- Layer 2: Cream filling. Spread about one-third of the cream cheese filling over the cookies. Smooth gently to avoid shifting the cookies.
- Layer 3: Biscoff drizzle. Drizzle a few spoonfuls of warmed cookie butter over the cream layer. It doesn’t have to be perfect—ribbons are great.
- Repeat layers. Add another layer of cookies, then cream, then drizzle.
Aim for three layers of cookies and three layers of cream, ending with cream on top.
- Chill. Cover tightly and refrigerate for at least 6 hours, preferably overnight. The longer it chills, the softer the cookies become and the better the texture.
- Finish and serve. Before serving, top with crushed Biscoff, a final drizzle of cookie butter, or berries. Slice with a sharp knife, wiping between cuts for clean edges.
How to Store
- Refrigerator: Keep covered and chilled for up to 4 days. The texture stays best within the first 48 hours.
- Freezer: Freeze tightly wrapped for up to 1 month.
Thaw in the fridge for several hours before serving. Slightly frozen slices taste like a semifreddo.
- Make-ahead tip: Assemble a day before serving for optimal texture and flavor.
Health Benefits
This is a dessert, so it’s indulgent—but there are a few positives. The cream provides calcium and some fat-soluble vitamins, and cream cheese adds a bit of protein.
The spices in Biscoff (like cinnamon) bring warm flavor and a small amount of antioxidants.
For a lighter approach, you can reduce added sugar and use less cookie butter. Swapping some or all of the heavy cream for Greek yogurt boosts protein and cuts fat, while still keeping the filling creamy. Portion control also helps you enjoy it without going overboard.
Pitfalls to Watch Out For
- Runny filling: If the whipped cream isn’t at stiff peaks, the cake won’t set well.
Whip until the peaks stand tall.
- Lumpy texture: Use room-temperature cream cheese and beat until smooth before adding other ingredients.
- Too sweet: Biscoff is sweet on its own. Start with less powdered sugar and add more only if needed.
- Soggy layers: Don’t add extra liquid to the cookie layers. The natural moisture from the filling is enough to soften them.
- Hard to slice: Chill long enough.
If it’s still soft, give it another hour. For extra clean slices, briefly freeze for 20–30 minutes before cutting.
Alternatives
- Lighter filling: Replace half the heavy cream with 1 cup of full-fat Greek yogurt. Add a tablespoon of lemon juice for brightness.
- Gluten-free: Use gluten-free speculoos-style cookies or gluten-free graham crackers.
Flavor will be slightly different but still delicious.
- No cream cheese: Swap with mascarpone for a milder, ultra-smooth filling. Adjust sugar down slightly.
- Chocolate twist: Add a thin layer of melted dark chocolate between the cookie and cream layers or sift cocoa on top.
- Fruit-forward: Layer in sliced bananas, strawberries, or raspberries for freshness that cuts the sweetness.
- Spice boost: Stir 1/2 teaspoon cinnamon or pumpkin spice into the filling for a cozier profile.
FAQ
Can I use whipped topping instead of heavy cream?
Yes, you can fold in whipped topping as a shortcut. The texture will be slightly lighter and sweeter, so reduce the powdered sugar a bit to balance it out.
Do I have to use Biscoff spread?
No.
It adds great flavor, but you can skip it and still get a tasty dessert. If you want a drizzle, warm caramel or melted chocolate works well as a substitute.
How long should it chill?
At least 6 hours, but overnight is best. That extra time lets the cookies soften into cake-like layers and gives you cleaner slices.
What if I only have a loaf pan?
That works fine.
You may get taller layers and need to break cookies to fit. Chill time stays the same, and slicing will be easy with a long, sharp knife.
Can I make it less sweet?
Yes. Use 1/2 cup powdered sugar or less, and go light on the Biscoff drizzle.
Adding a bit of Greek yogurt or lemon zest to the filling also helps balance sweetness.
Will it hold up at room temperature?
It’s best served chilled. Leave it out no longer than 1–2 hours. If serving outdoors or in warm weather, keep it in a cooler until right before serving.
Can I add a crunchy layer?
Absolutely.
Sprinkle crushed toasted nuts, crumbled Biscoff, or a thin chocolate shell between layers for contrast.
Wrapping Up
This No-Bake Biscoff Icebox Cake with Cream Cheese Filling delivers big flavor with almost no effort. It’s creamy, spiced, and satisfying, with a texture that only gets better as it chills. Keep the ingredients on hand, and you can pull together a crowd-pleasing dessert anytime—no oven needed.
Customize it, make it ahead, and serve it cold.
Simple, reliable, and downright delicious.