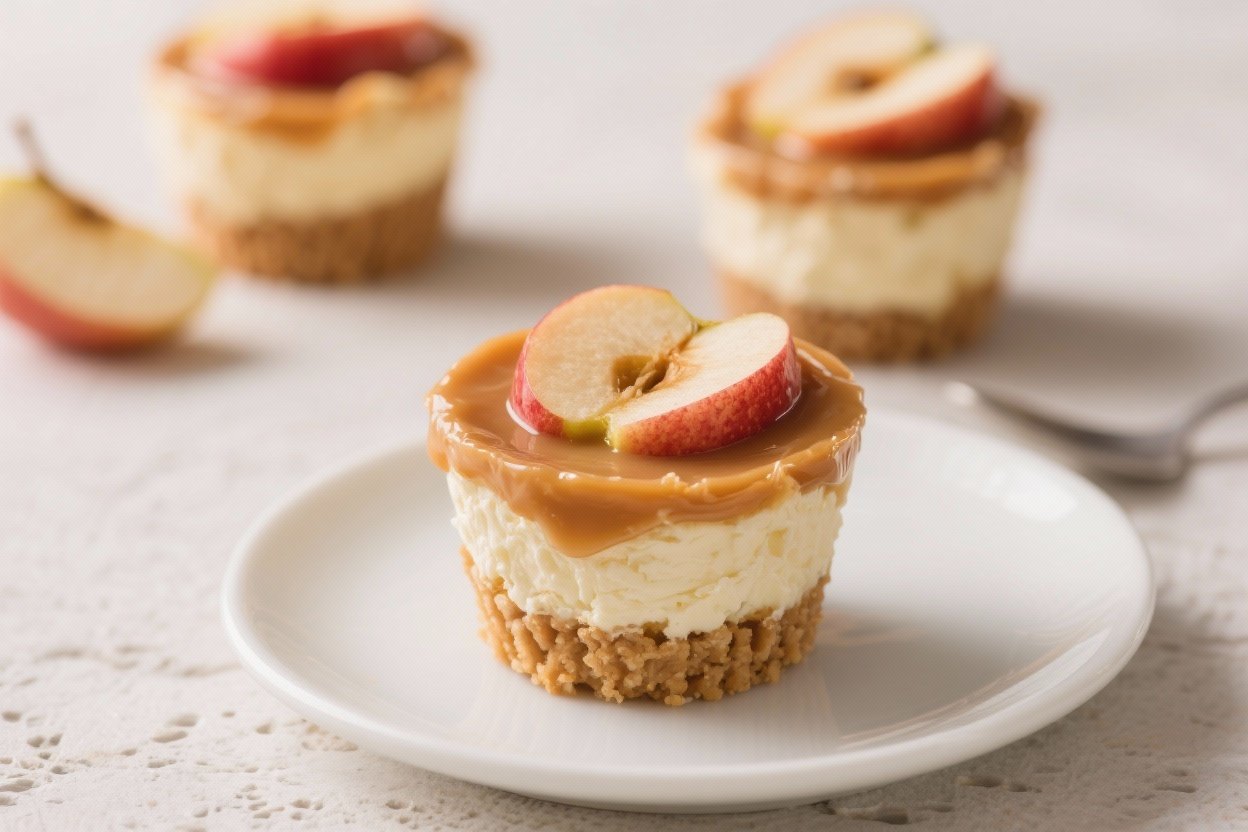
Easy No-Bake Caramel Apple Cheesecake Cups – A Quick, Cozy Treat
If you love caramel apples and creamy cheesecake, these no-bake cups bring both together in a fast, fuss-free dessert. They’re layered, pretty to look at, and even easier to serve—perfect for weeknights, holidays, or last-minute guests. No oven, no water bath, no stress.
Just crisp apple, silky cheesecake, and a buttery cookie crumb with a glossy caramel finish. Make them in jars, glasses, or disposable cups and you’re set.
What Makes This Special
- No baking required: Chill and serve. That’s it.
- Great texture contrast: Crunchy crumb, creamy filling, tender apples, and sticky caramel.
- Make-ahead friendly: They actually taste better after a short rest in the fridge.
- Individually portioned: Perfect for parties and easy to transport.
- Flexible ingredients: Swap cookies, tweak spices, or use store-bought caramel.
Ingredients
- For the crust:
- 1 1/2 cups graham cracker crumbs (or digestive biscuits)
- 5 tablespoons unsalted butter, melted
- 2 tablespoons brown sugar
- Pinch of fine salt
- For the cheesecake filling:
- 12 ounces cream cheese, softened
- 1/2 cup powdered sugar
- 1 teaspoon vanilla extract
- 1 cup cold heavy whipping cream
- Pinch of salt
- For the caramel apples:
- 2 medium apples (Honeycrisp, Gala, or Granny Smith), peeled and diced small
- 1 tablespoon lemon juice
- 2 tablespoons butter
- 2 tablespoons brown sugar
- 1/2 teaspoon ground cinnamon
- Pinch of nutmeg (optional)
- Pinch of salt
- For topping:
- 1/2 cup thick caramel sauce (store-bought or homemade)
- Crushed pecans or toasted almonds (optional)
- Extra cinnamon for dusting (optional)
- Equipment:
- 6–8 small jars or cups (6–8 ounces each)
- Mixing bowls and hand mixer
- Small skillet
- Spatula and spoon
How to Make It
- Make the crust: Stir graham crumbs, melted butter, brown sugar, and a pinch of salt until it looks like wet sand.
It should clump when pressed. If it’s dry, add 1 more tablespoon of melted butter.
- Portion the crust: Spoon 2–3 tablespoons into each cup and press down firmly with the back of a spoon. Chill while you make the filling so it sets slightly.
- Whip the cream: In a cold bowl, beat heavy cream to stiff peaks.
Don’t overmix. Set aside.
- Make the cheesecake base: In another bowl, beat softened cream cheese, powdered sugar, vanilla, and a pinch of salt until ultra smooth and fluffy, about 2 minutes.
- Fold in the cream: Gently fold the whipped cream into the cream cheese mixture in two additions until no streaks remain. The filling should be light and cloud-like.
- Cook the apples: In a small skillet, melt butter.
Add diced apples, lemon juice, brown sugar, cinnamon, nutmeg, and a pinch of salt. Cook over medium heat for 3–5 minutes, stirring, until just tender but not mushy. Let cool completely.
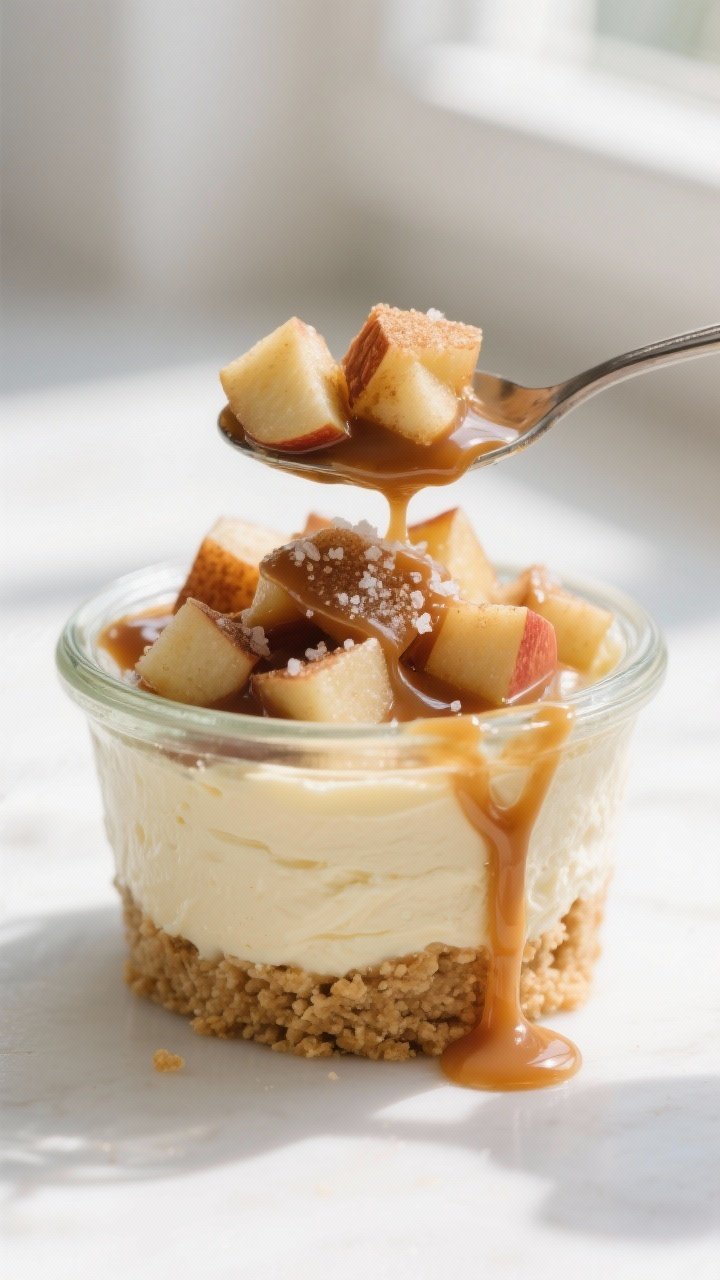
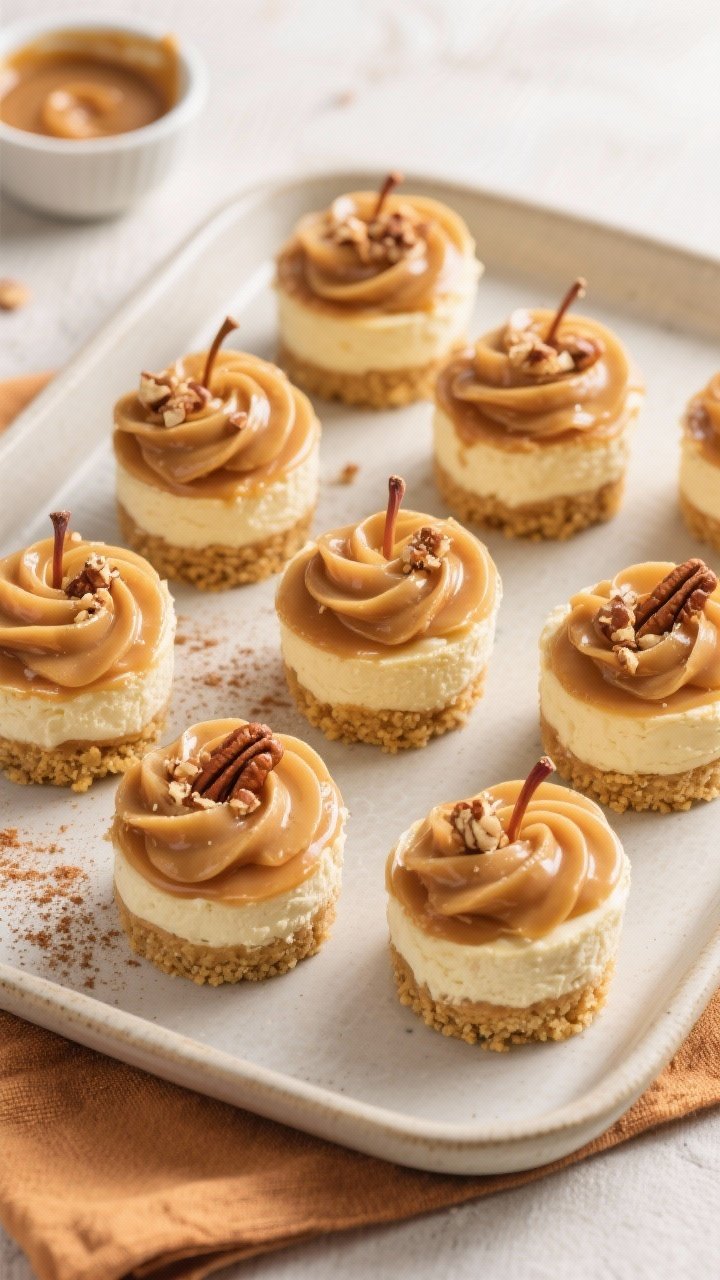
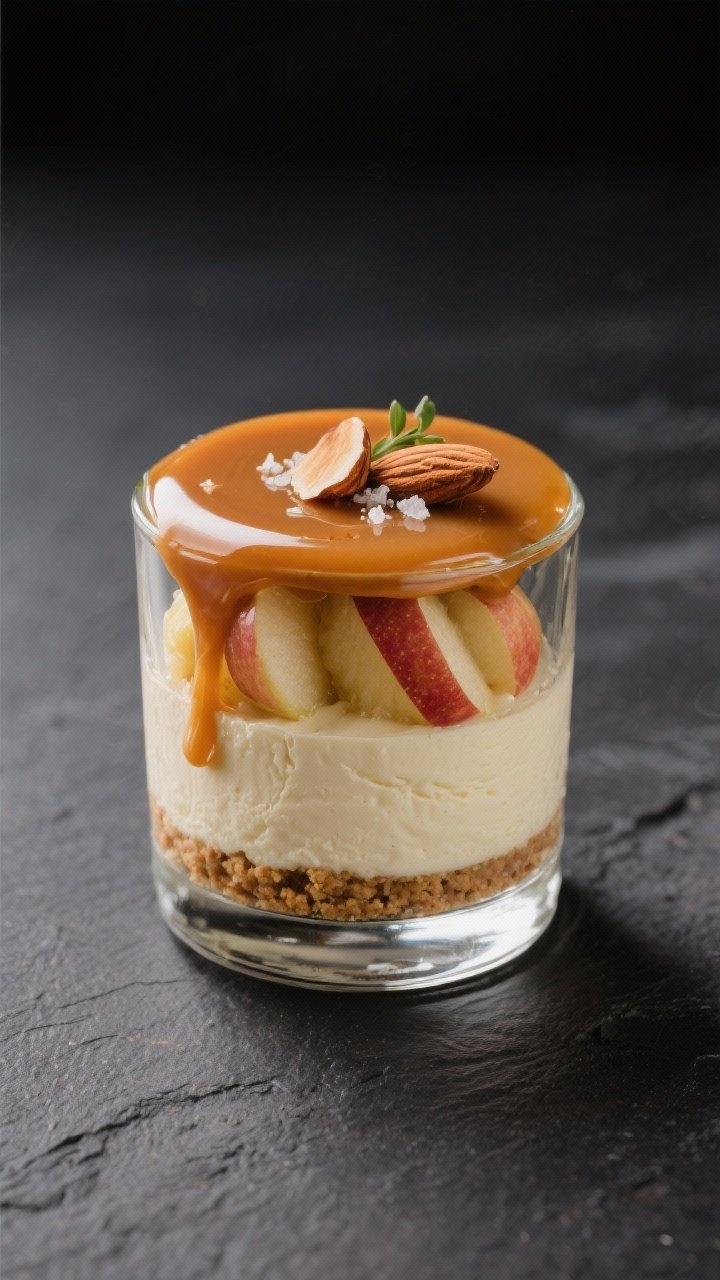
- Assemble the layers: Add a scoop of cheesecake filling over the crust, about 1/3 cup per cup.
Spoon a layer of cooled apples over the cheesecake. Add a small drizzle of caramel.
- Repeat (optional): For taller cups, add another thin layer of cheesecake and apples.
- Top it off: Finish with a generous swirl of caramel sauce. Sprinkle nuts or a pinch of cinnamon if you like.
- Chill: Cover and refrigerate for at least 1 hour, up to 24 hours.
The texture firms up and the flavors blend as it chills.
Keeping It Fresh
- Refrigeration: Keep covered in the fridge. They’re best within 24–48 hours.
- Prevent sogginess: If you need to hold them longer, add the caramel and nuts just before serving. You can also brush the crust layer with a thin swipe of melted chocolate to create a moisture barrier.
- Apples: Make sure the apple mixture is fully cooled before layering to avoid condensation and runny cups.
- Freezing: Not recommended.
The whipped cheesecake can lose its airy texture after thawing, and the apples can get watery.
Health Benefits
- Apples provide fiber and polyphenols: They add gentle sweetness and a bit of volume without relying entirely on sugar.
- Portion control built in: Individual cups help you enjoy dessert without over-serving.
- Customizable sweetness: You can reduce the powdered sugar or use a lighter caramel to fit your needs.
- Balanced textures encourage satisfaction: Crunch, cream, and chew can make a small portion feel more satisfying.
What Not to Do
- Don’t skip softening the cream cheese: Cold cream cheese makes lumpy filling that won’t smooth out easily.
- Don’t add warm apples: Warm fruit will melt the filling and make the layers weep.
- Don’t overwhip the cream: Overwhipped cream turns grainy and can separate. Stop at stiff peaks.
- Don’t use a thin caramel: Watery sauce slides off and soaks the crust. Use a thick, spoonable caramel.
- Don’t forget the salt: A pinch in each component brightens flavor and balances sweetness.
Variations You Can Try
- Salted pretzel crust: Swap grahams for crushed pretzels and reduce added salt.
The sweet-salty vibe is fantastic with caramel.
- Maple cheesecake: Replace half the powdered sugar with maple syrup and add a touch more cream cheese to keep it thick.
- Ginger snap base: Use crushed ginger snaps for a spicy kick that pairs well with apples and caramel.
- Yogurt lift: Replace one-fourth of the cream cheese with Greek yogurt for tang and a lighter feel. Drain yogurt first for thickness.
- Bourbon caramel: Stir a teaspoon of bourbon into your caramel for a grown-up twist.
- No-cook apples: Skip the skillet and toss diced apples with lemon juice, a little sugar, and cinnamon for crunchier layers.
- Gluten-free: Use gluten-free cookies for the crust and confirm your caramel is gluten-free.
- Nut-free: Omit nuts and add crushed apple chips or oat clusters for crunch.
FAQ
Can I make these a day ahead?
Yes. Assemble the crust and cheesecake layers, then add apples and caramel just before serving for the best texture.
If you add everything at once, they still hold up well for about 24 hours.
What apples work best?
A mix of sweet and tart is ideal. Honeycrisp, Gala, and Granny Smith all hold texture well. Dice them small so each spoonful gets even flavor.
Can I use canned apple pie filling?
You can, but it’s sweeter and softer than fresh apples.
If you use it, reduce the caramel a bit and consider a spiced cookie crust to balance flavor.
How do I thicken runny caramel?
Simmer it briefly to reduce, or stir in a little extra caramel candy melted with cream until it’s thick and glossy. Let it cool before topping.
What if I don’t have a hand mixer?
You can whisk the cream by hand in a chilled metal bowl. It takes a few minutes but works fine.
Beat the cream cheese vigorously with a sturdy whisk until smooth.
Can I cut the sugar?
Yes. Reduce the powdered sugar in the filling to 1/3 cup and use less caramel. The apples and vanilla keep the dessert flavorful.
How many servings does this make?
You’ll get 6–8 servings depending on cup size and how generously you layer.
For party tastings, you can stretch it to 10 mini portions.
Why is my crust crumbly?
It likely needs more butter or firmer packing. Add 1 tablespoon melted butter and press the crust down more firmly with a spoon or tamper.
In Conclusion
These Easy No-Bake Caramel Apple Cheesecake Cups are all about comfort without complication. They’re creamy, cozy, and just fancy enough to impress, yet simple enough for any night.
Keep the steps easy, chill them well, and use thick caramel for a clean finish. Once you try them, they’ll become your go-to fall dessert—and probably a year-round favorite.