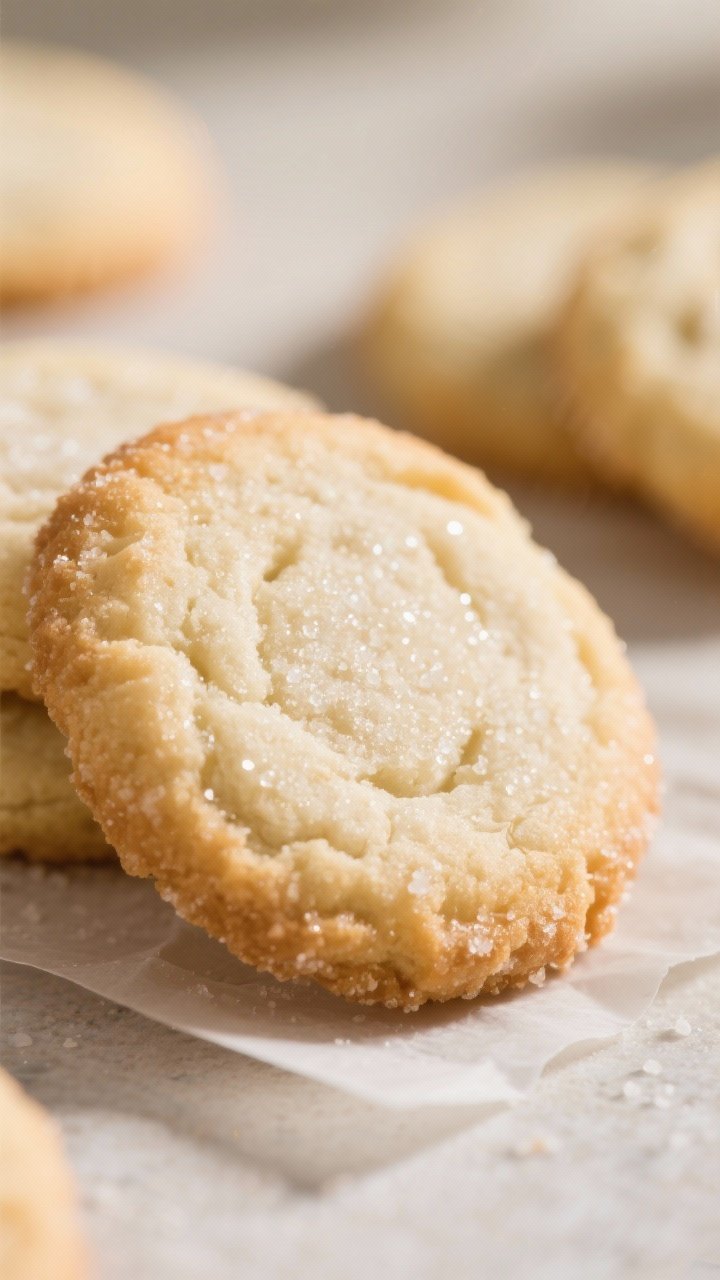
Old-Fashioned Sugar Cookies – Simple, Soft, and Sweet
There’s something timeless about an old-fashioned sugar cookie. Soft in the center with a delicate, crisp edge, these cookies are the kind you remember from bake sales and grandma’s kitchen. They’re simple, comforting, and perfect for any occasion—holidays, birthdays, or a quiet afternoon treat.
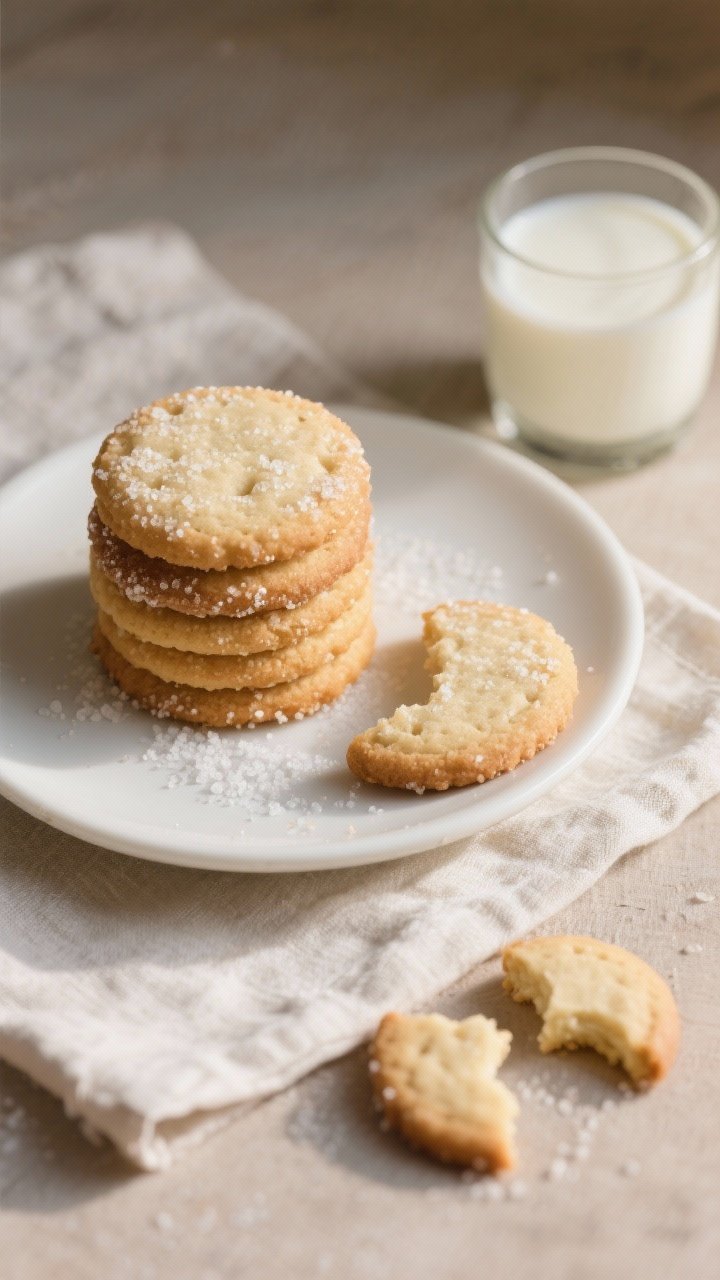
This version leans classic: buttery, lightly sweet, and finished with a sprinkle of sugar. No fancy tricks, just tried-and-true technique that delivers consistent, delicious results.
Why This Recipe Works
Traditional sugar cookies shine because of a few small details done right. Creaming butter and sugar properly traps air, giving the cookies a light, tender texture.
A mix of granulated sugar and a touch of brown sugar adds depth and keeps the centers soft. Chilling the dough keeps the cookies from spreading too much, so they hold that perfect bakery-style shape. Lastly, rolling the dough balls in sugar before baking creates a sparkling, slightly crisp finish.
Ingredients
- 2 3/4 cups (330 g) all-purpose flour
- 1 teaspoon baking powder
- 1/2 teaspoon baking soda
- 1/2 teaspoon fine sea salt
- 1 cup (225 g) unsalted butter, softened to room temperature
- 1 cup (200 g) granulated sugar
- 1/4 cup (50 g) light brown sugar, packed
- 1 large egg, at room temperature
- 1 large egg yolk, at room temperature
- 2 teaspoons pure vanilla extract
- 2 tablespoons milk or cream (optional, for a softer cookie)
- Extra granulated sugar, for rolling
Instructions
- Preheat and prep. Set your oven to 350°F (175°C).
Line two baking sheets with parchment paper or silicone mats. This prevents sticking and helps the cookies bake evenly.
- Mix the dry ingredients. In a medium bowl, whisk together the flour, baking powder, baking soda, and salt. Set aside.
Keeping the dry mix uniform helps avoid overmixing later.
- Cream the butter and sugars. In a large bowl, beat the softened butter with the granulated and brown sugars on medium speed for about 2–3 minutes, until light and fluffy. You’re looking for a pale color and creamy texture.
- Add egg, yolk, and vanilla. Beat in the egg, then the egg yolk, followed by the vanilla. Mix until smooth and combined.
Scrape the bowl as needed.
- Optional: Add milk or cream. If you prefer a slightly softer, chewier cookie, beat in the milk now. This adds moisture and tenderness.
- Combine wet and dry. Add the dry ingredients to the butter mixture in two additions, mixing on low just until no streaks of flour remain. Avoid overmixing to keep the cookies tender.
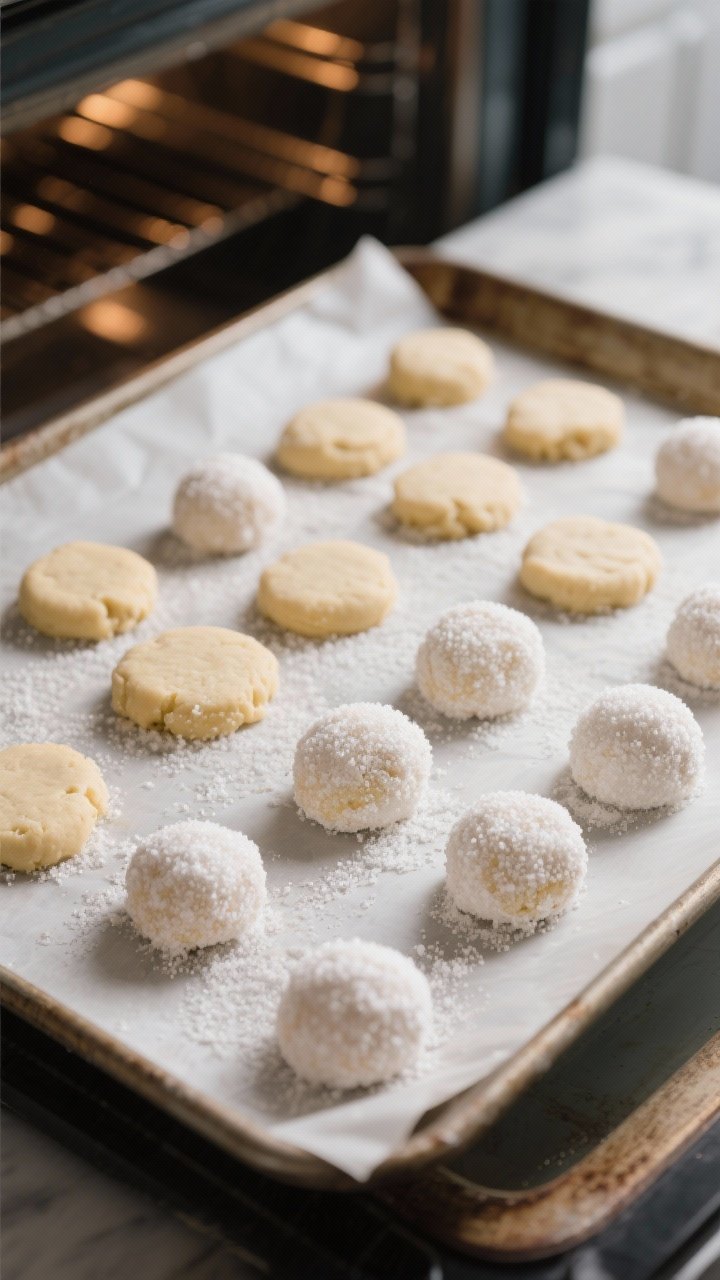
- Chill the dough. Cover the bowl and chill for 30–45 minutes. This step helps control spread and improves flavor.
If your kitchen is warm, err on the longer side.
- Form and coat. Scoop dough into 1 1/2-tablespoon portions (about 30–35 g each). Roll into balls, then roll each ball in granulated sugar to coat. For a more traditional look, you can lightly flatten the tops with your fingertips.
- Bake. Arrange on the prepared sheets, spacing about 2 inches apart.
Bake for 9–11 minutes, until the edges are set and just lightly golden, but the centers still look soft. Do not overbake—they’ll firm up as they cool.
- Cool. Let the cookies rest on the baking sheet for 5 minutes, then transfer to a wire rack to cool completely. This helps them finish setting without drying out.
Keeping It Fresh
Store cooled cookies in an airtight container at room temperature for up to 5 days. Slip a small piece of bread or a few marshmallows into the container to keep them soft.
For longer storage, freeze the baked cookies for up to 2 months; thaw at room temperature. You can also freeze unbaked dough balls for up to 2 months—bake from frozen, adding 1–2 extra minutes.
Benefits of This Recipe
- Familiar flavor, reliable texture. Balanced sweetness with buttery richness and a soft center.
- Beginner-friendly. Straightforward steps with ingredients you likely have on hand.
- Make-ahead friendly. Dough chills well and bakes beautifully from frozen.
- Versatile base. Easy to customize with citrus zest, spices, or festive toppings.
- Great for sharing. A crowd-pleaser that fits holidays, potlucks, and bake sales.
Pitfalls to Watch Out For
- Overbaking. If the cookies are golden all over in the oven, they’ll end up dry. Pull them when edges set and centers look slightly soft.
- Skipping the chill. Warm dough spreads too much, leading to thin, overly crisp cookies.
- Butter too cold or too warm. Butter should be soft but not greasy.
Press it and it should yield slightly without melting.
- Overmixing the dough. This can make cookies tough. Mix just until combined after adding flour.
- Inaccurate measuring. Too much flour leads to dense cookies. If possible, weigh your flour for best results.
Variations You Can Try
- Lemon Sugar Cookies: Add 1 tablespoon lemon zest and 1 tablespoon lemon juice; roll in lemon-sugar (zest mixed with sugar).
- Almond Twist: Swap half the vanilla for almond extract and sprinkle sliced almonds on top before baking.
- Spiced Sugar Cookies: Add 1/2 teaspoon cinnamon and 1/4 teaspoon nutmeg to the dry ingredients.
- Glitter Crust: Roll dough balls in coarse sanding sugar for extra crunch and sparkle.
- Brown Butter Version: Brown the butter, cool until solid but soft, then proceed.
Expect a nuttier flavor and slightly denser texture.
- Cutout-Style: Reduce milk, chill dough longer, then roll between parchment to 1/4 inch and cut shapes. Bake 8–10 minutes.
- Glazed Top: Whisk powdered sugar with milk and a splash of vanilla, then drizzle over cooled cookies.
FAQ
Can I skip the brown sugar?
Yes. Use all granulated sugar if you prefer a crisper edge and slightly less chew.
The flavor will be a touch lighter but still classic.
Do I have to chill the dough?
It’s strongly recommended. Chilling helps the flour hydrate and the fat firm up, which improves texture and controls spread.
How do I get perfectly round cookies?
Right after baking, while the cookies are still hot, scoot a round cookie cutter or a glass around each cookie to nudge the edges into a neat circle. Work quickly.
What if I don’t have a mixer?
You can mix by hand with a sturdy spatula.
Make sure the butter is soft and take extra time to cream it well with the sugar for lightness.
Can I make them thicker and softer?
Yes. Chill the dough longer, keep the portions a bit larger, and underbake slightly. Adding the optional milk also helps create a softer center.
How do I make them gluten-free?
Use a 1:1 gluten-free all-purpose flour blend that includes xanthan gum.
The texture will be slightly different but still tasty.
Can I add sprinkles?
Absolutely. Fold in 1/2 cup of sprinkles or roll the tops in sprinkles after the sugar coating for a fun look.
Why did my cookies turn out dry?
Likely overbaking or too much flour. Next time, pull them earlier and weigh the flour.
Also ensure your oven temperature is accurate.
Can I make these dairy-free?
Use a good-quality plant-based butter stick and non-dairy milk if using the optional milk. Flavor and texture will still be close to classic.
How many cookies does this recipe make?
About 24–28 cookies, depending on scoop size. Larger scoops will yield fewer cookies and require a minute or two more in the oven.
Final Thoughts
Old-fashioned sugar cookies don’t need bells and whistles to impress.
With a few simple steps and everyday ingredients, you’ll get soft, buttery cookies with that signature sugared crust. Keep an eye on bake time, chill the dough, and measure well—those are the keys. Whether you stick to classic or try a fun twist, this recipe will earn a regular spot in your baking rotation.
Warm cookie, cold glass of milk, and you’re set.
Printable Recipe Card
Want just the essential recipe details without scrolling through the article? Get our printable recipe card with just the ingredients and instructions.